Wednesday, June 14, 2006

Prezzies for the Kidlets

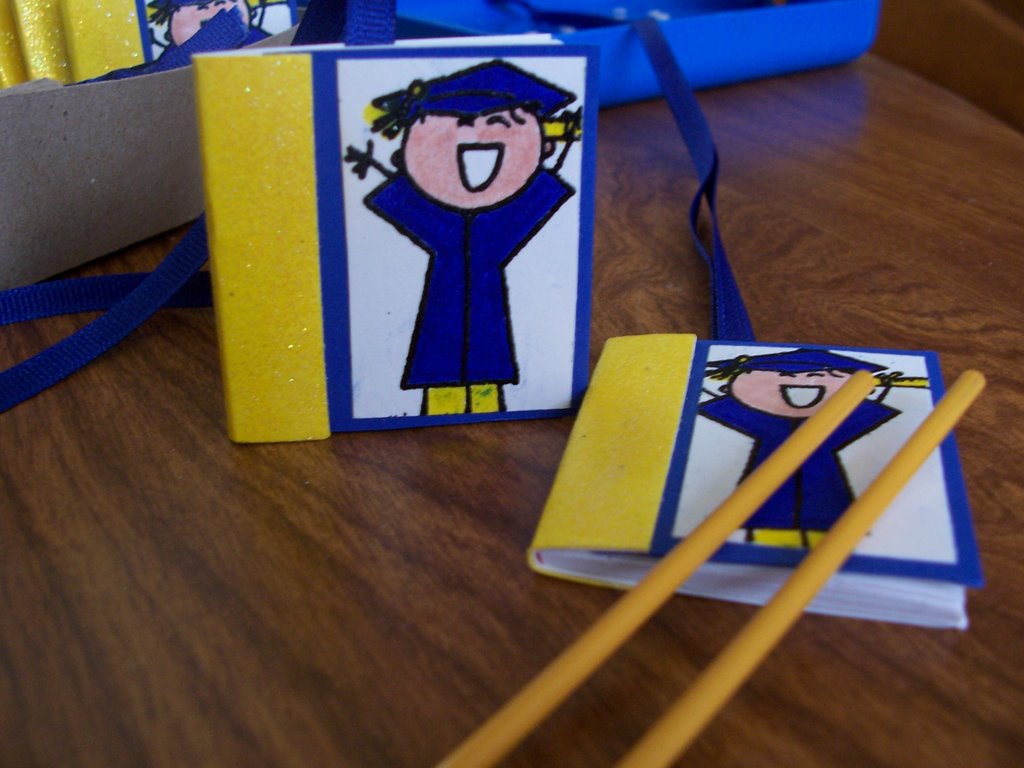
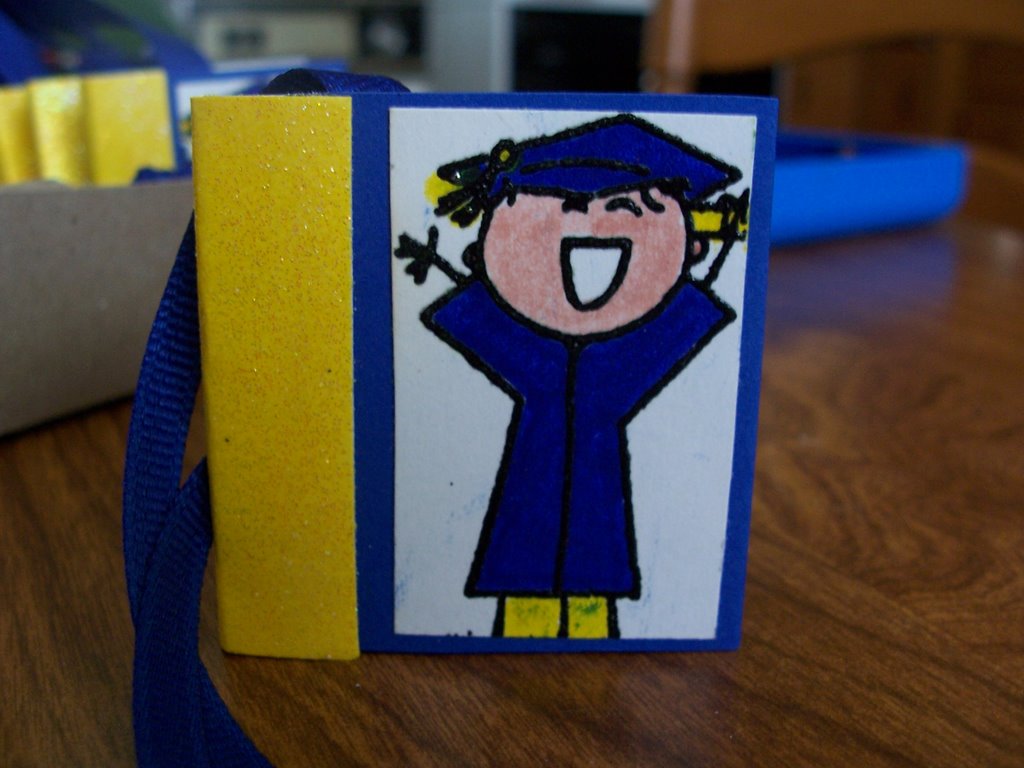
These are mini "Year Books" that I made for Lila's preschool chums. I put a ribbon on each one so it could hang as a necklace. The pages are blank inside. I got these cute little matchbook notebooks and teeny pencils at the stamping convention. The booth (Vippies) that I got them from had some examples of how to cut the cover off to turn the matchbook in a notebook style. I used embossing glitter on the binding to make it pop. The stamp came from Michaels.


Saturday, June 10, 2006

Teacher Thank-You Gifts

Boy, it's been awhile since I've done anything creative! Here are the teacher gifts I made for Lila's preschool teachers. Actually, I had a significant amount of help from my friend, Mary. She came over after the kids went to bed and help me get the ideas flowing and the paper crafted. Our hubbies had some good imput as well. Anyway, these are called Post It Slides. They are 3x5 and 4x6 acrylic frames that lay down on the desk rather than stand up to hold a picture. I found some cool calendars at a stamping expo, so I added those on. I also made pens to go w/each one. It's just patterned paper tucked inside a clear pen, but it looks neat. Thanks for all the help with these, guys! It's much appreciated :)


Saturday, April 08, 2006

This one is for a little girl who just turned five. She's having a princess themed party, so I tried to make a ball gown card. It came out ok, but it's not exactly what I envisioned. You know when you have a picture in your head of what you want to accomplish, but you just can't get it to happen? I hate that. Still, this is better than my first attempt but it's not quite right. I'm not sure yet what's bugging me about it. Anyway, the top of the gown is beaded. I used tacky tape (love that stuff!) and micro beads. I stamped some flowers on the bodice and the skirt to give it some interest and used two layers of the fabric on top of that. It opens on the side. You can see on the left side skirt a straight part, that's the hinge.

Birthday Boy

Birthday card for a little boy who just turned two. I used a cloud stencil and for the background and colored the frogs in using a blender pen and inks. They look a little morose, but I just love these frogs!

Saturday, March 11, 2006

Anniversary Invite 2

Here is another variation on the vellum single card invite. It may even look better if the picture was bigger, maybe just to the edge of the green card stock. The machine at Walmart could probably do that. This is easy because there is no stamping involved. The words were printed on the vellum. That took a little fudging to get it right. Maybe if I was a measure-er instead of an eyeball-er that would be easier. Since the party is a 50th anniversary, wouldn't it look nice to see an original b/w wedding photo behind there? Although, I think my two girls (right) and my niece Wendy (left) are pretty darn cute on this!

Valentine's Day


I made these for my preschooler's classmates for Valentine's Day. It's a mini shaker box. It'a pretty small, maybe 3x4. It was easy to do, just a little time consuming. Using foam tape from the hardware department of Walmart was the easiest way to make the box. The stamps and paper all came from Stampin' Up. The background stamp is By Definition. It's one of my favs, it has the dictionary definition of love *aww*.

Party Invite

This is a mock up for a 50th Anniversary invite. One of my husband's co-workers needed some ideas. It's single card style, the words were printed on the computer then stamped with flowers. Then there is a vellum overlay and some organza ribbon. This ribbon won't lay flat because it's a scrap piece that was balled up in my stamp closet. I think if she's making 20 or more, this will be easiest.


Saturday, March 04, 2006

Mail Art

This is my first mail art project. I did it in a post card style. I actually had to look up the size of a post card, I had no idea. I hope she likes it!


Jasmine's birthday invite


This is the birthday party invitation that I made last year for Jasmine's 11th birthday. I think I made somewhere around 20 or so. I forgot to save one for myself, so one of the mothers was kind enough to give me her copy. It's hard to see in this pic, but the background is a checkerboard pattern stamped in Versamark. I got all the little game doodads at a scrapbooking store and the playing cards are some I had. Some of the other invites had more game pieces on them. This must have been made toward the end when I was running out of stuff. I was pleased with the way the card came out, however, the party was a disaster. A 3 hour coed party of 15-20 eleven year olds is a big mistake. We like to joke that the next coed party for her that we host will be her wedding reception!

New baby!


Mmmm.. I need to work on taking better pictures for this site. This is for one of my husband's customers. He and his wife just had a baby boy. The background is done with liquid inks that are dripped on to 3-4 diaper wipes that are folded in half. You then press the wipes onto the cardstock to get a pattern you like. I was bound and determined to get those damn ribbons on there. Who knew tying knots could be so tough?

Valentine


This is the valentine that I made for my hubby this year. It's called the Waterfall technique. It was easy to do, once we figured out how. The "we" is my sister in law Tammy and I. We spent several hours one night searching the net for instructions and drafting demos that ended up sucking. We finally reworked the directions and came up with our own that are so easy. If anybody wants the directions, let me know in the comments section!

Birthday Invite


This is the invitation I made this year for my daughter's 5th birthday party. The word stamps (You're Invited, Happy Birthday), small flower stamp, and striped paper came from Stampin' Up. All the other stuff is from Michael's. I only had to make about ten of these. As soon as I figured out the design I wanted, it was pretty easy. The most time consuming part was putting together all the flowers. They had to be punched from two different colors of paper and then fastened with a flat top eyelet. Thankfully, I found the leaves at Michael's because I started to hand cut them all. Ug! You can click the picture for a closer look.